After the previous photo was posted, questions were raised including, “How did you get so much color from this shot (and I hope your response is not “I took it in BALIâ€), and how did you stop the sun from wrecking the foreground. Amazing.”
Generally I don’t allow a peek behind the curtain, but in this case I’ll make an exception. Most you know that I don’t use too much manipulation with my photos. I generally try to remain consistent with the way my eyes took in a scene. However, at times it’s more fun to experiment, and to bring an image to the level you experienced it.
This scene at Tanah Lot (Hindu temple) is in a beautiful location. However, any place on the equator experiences very rapid sunrises and sunsets, so you must be ready for the light to change very quickly. In most cases, a camera cannot properly deal with a scene like this – one where the sun is included in the background. You must choose, to have the foreground properly exposed, or the background.
To do this accurately, you MUST use a tripod or some other way of stabilizing the camera. Any slight movement amongst multiple exposures will be very evident in the final image. I would also highly recommend using a cable release or wireless transmitter to activate the shutter. You then would set your camera to take three consecutive photos – perhaps one stop overexposed, one stop underexposed, and one at the optimum exposure. Play around with these settings to find the right one, and if in doubt, take a ridiculous amount of photos, you can throw away the duds later.
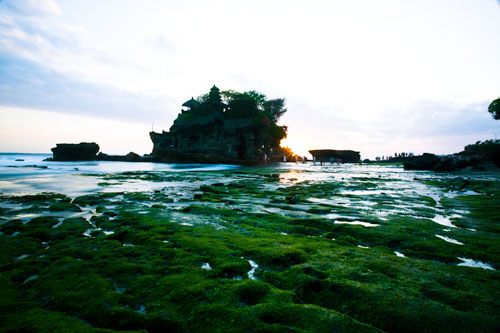
The photo below demonstrates this, I exposed for the foreground:
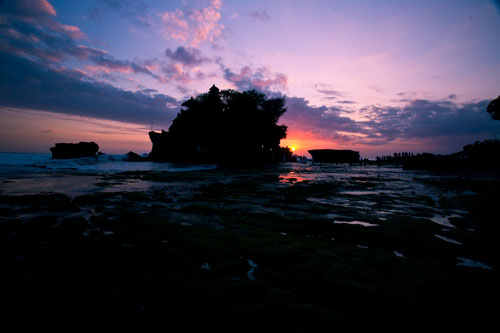
The next shot was exposing for the sky:
I didn’t bother using the middle exposure in this case. Only the over/under versions. Now I used Lightroom for the initial adjustments and then brought it into Photoshop CS3. However, you could easily do this with older versions of PS (without the need for Lightroom).
Open both photos.
Drag one image on top of the other (lined up perfectly of course)
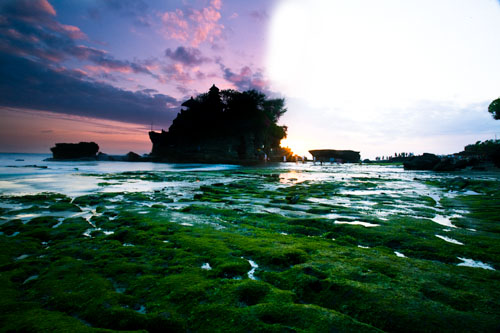
And use a “mask” to paint away the areas from the top layer where you’d like the background to come through. I would work very carefully, zoomed into at least 100% for this part. Take into consideration things like the movement of clouds, water, people, or other objects which may have shifted with time.
Here is what it’ll look like as you work:
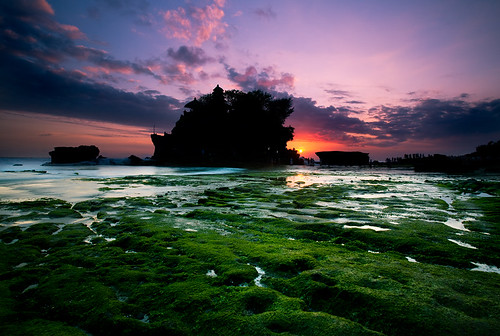
The final photograph can take the best of both worlds – the beautiful foreground, and a properly exposed sky. The result may be stunning without being overly exaggerated.